
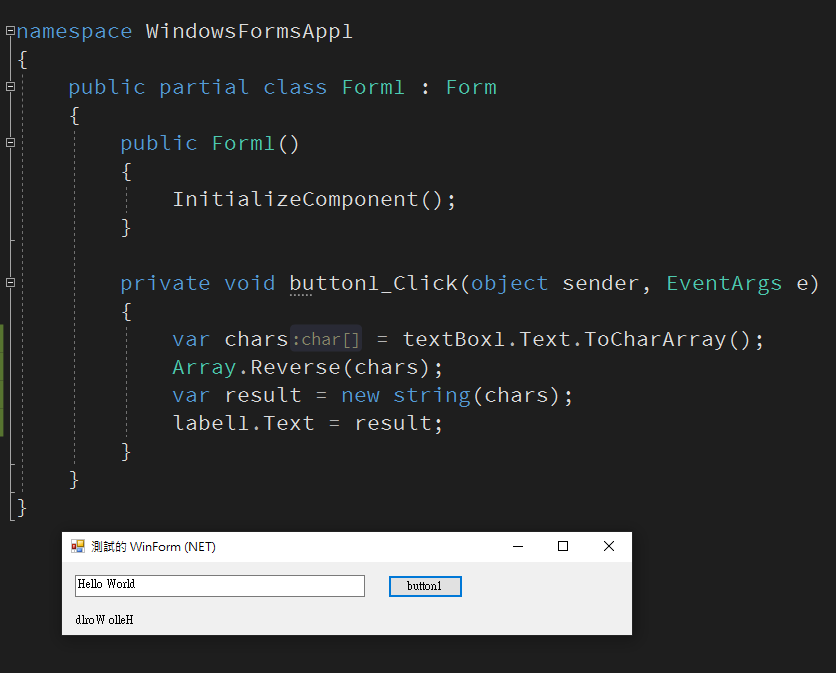
使用 WinForm 寫一個字串反轉的範例 :
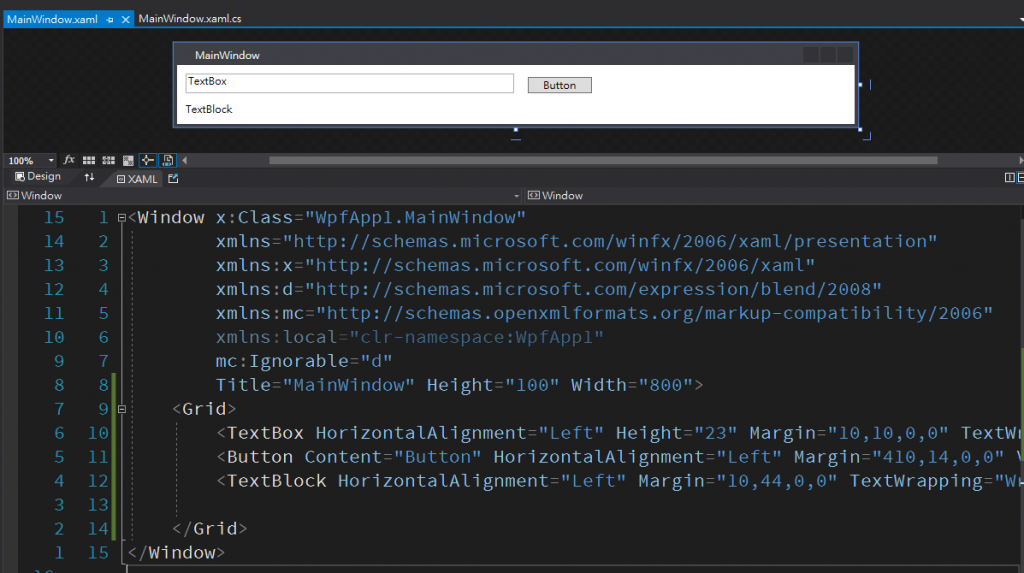
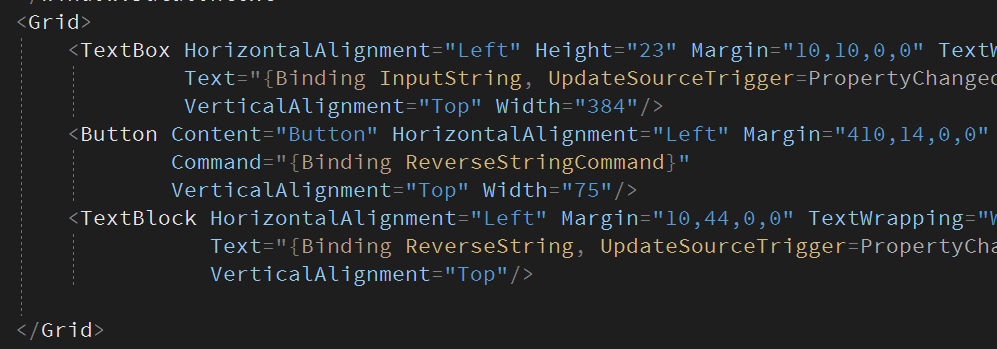
新增 WPF 專案,在畫面建立三個控制項 :
- TextBox
- Button
- TextBlock
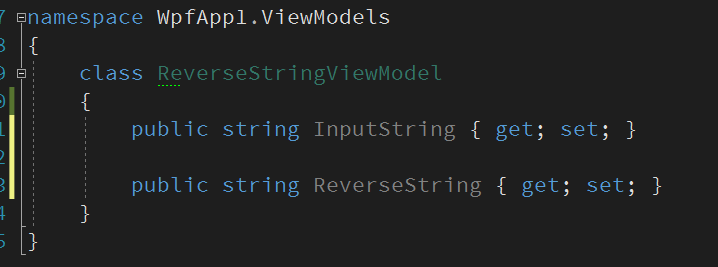
使用 ViewModel
建立 ViewModel
WPF 使用 Window.DataContext 將 ViewModel 繫結到 View
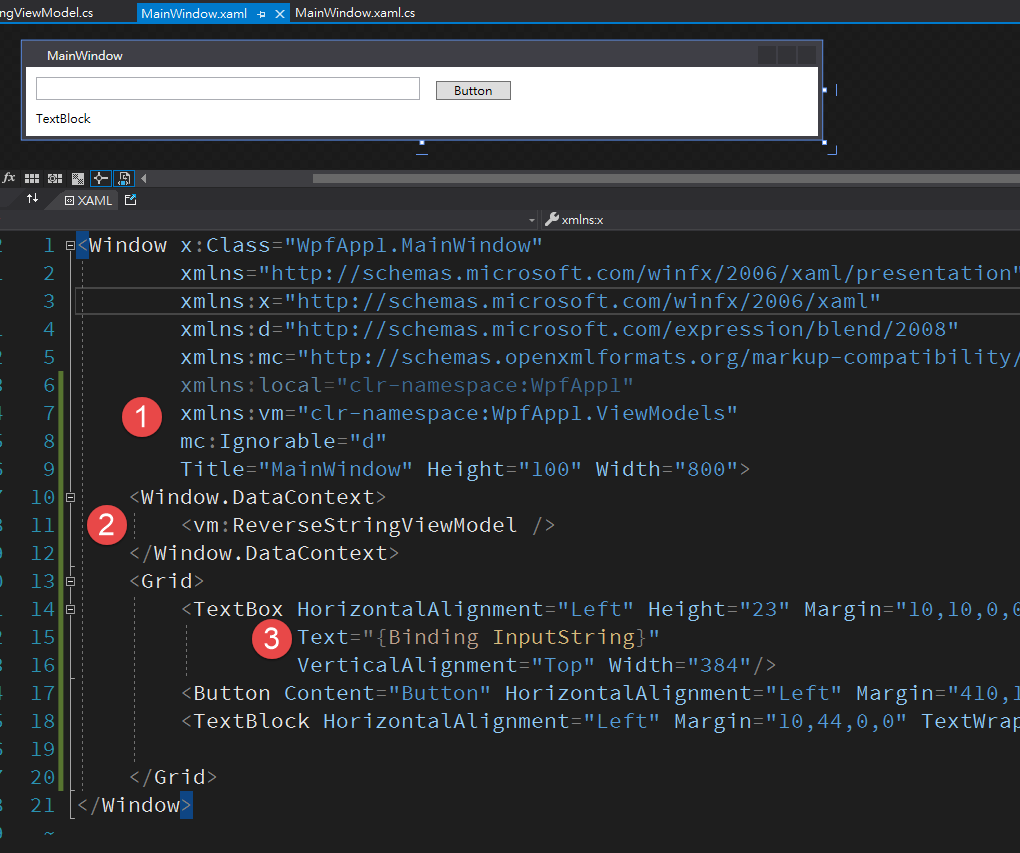
- 因為 ReverseStringViewModel 的 namespace 在 WpfApp1.ViewModels 底下, 所以創建了一個 xmlns:vm 指向該 namespace
- Window.DataContext 設定 DataContext 的 ViewModel
- 在 TextBox 使用 Binding 繫結 ViewModel 的屬性
為了方便識別,在 TextBlock 也使用 {{Binding InutString}}
測試的時候可以發現,只有觸發按鈕的時候,才會呼叫寫回資料到 ViewModel

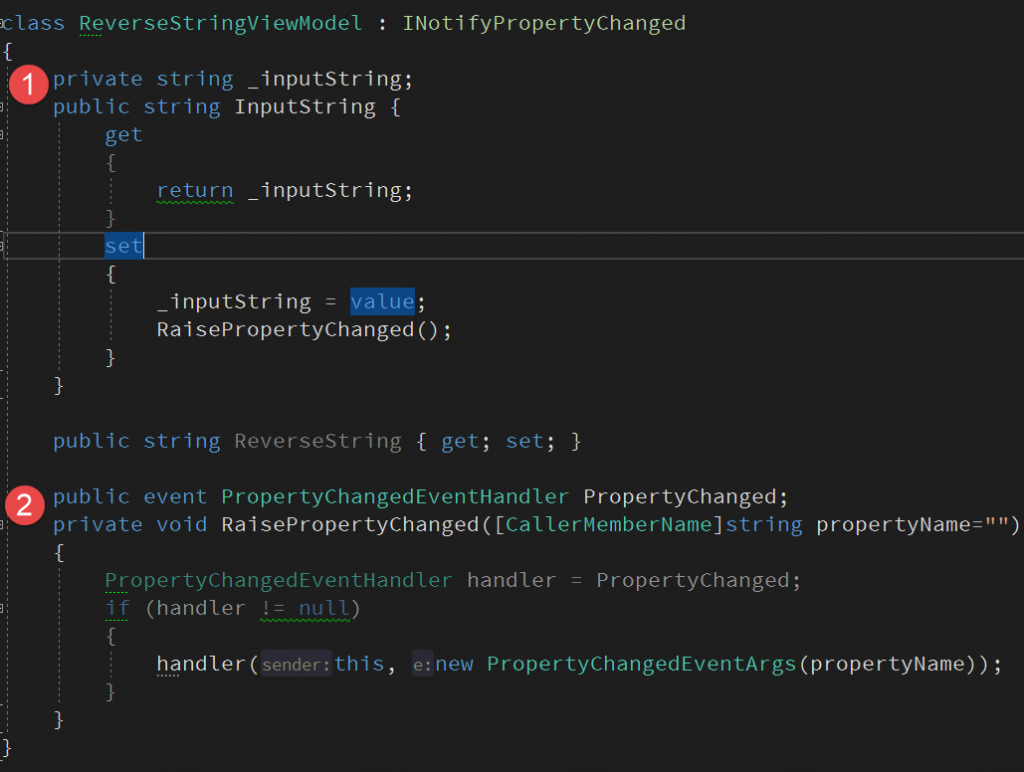
INotifyPropertyChanged
為了讓資料可以即時更新,需要讓 ViewModel 繼承實作 INotifyPropertyChanged
完成之後,回到 Binding 的地方,增加一個屬性 UpdateSourceTrigger=PropertyChanged
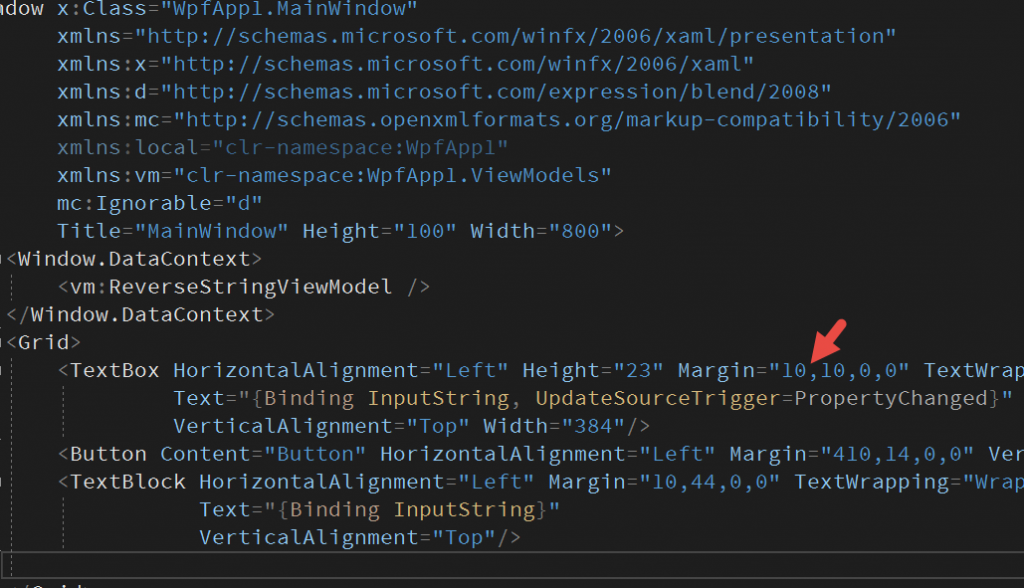
此時畫面輸入值的時候,底下的 TextBlock 也會跟著更新

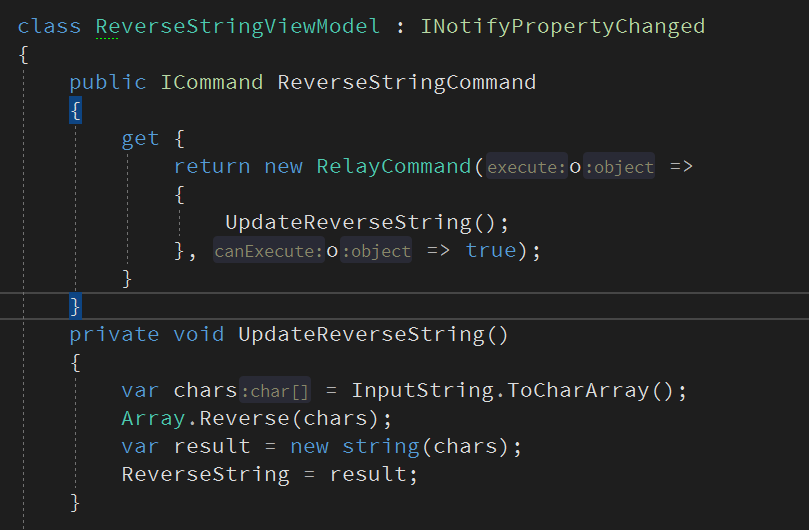
ICommand
在 WPF 可以使用 WinForm 的 Click 事件,但為了可以讓他與介面分離,實作到 ViewModel ,提供了 ICommand 介面
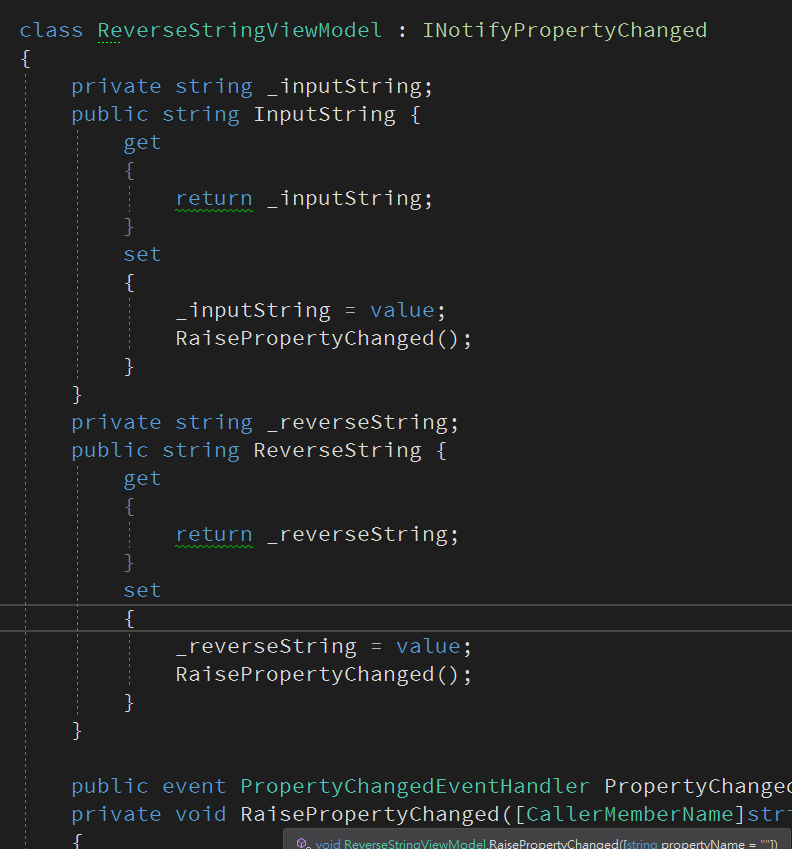
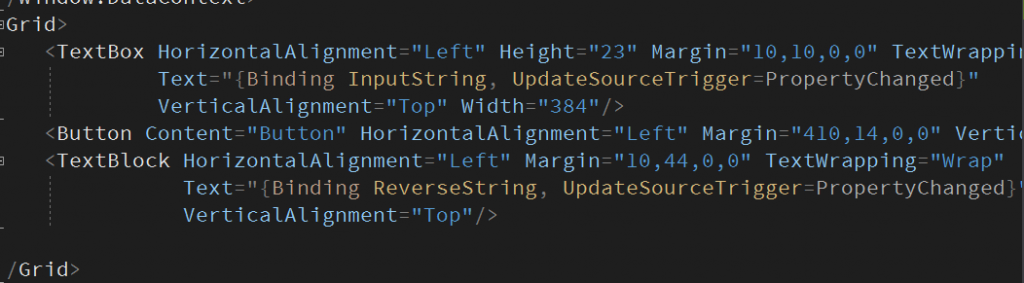
先修正 ViewModel 的 ReverseString 與畫面的 TextBlock 改 Binding ReverseString
ICommand 需要兩個方法,但如果只為了這功能,每個 ICommand 都要繼承並實作一個 xxxComand 其實很費工,所以通常會建立一個 RelayCommand
RelayCommand 有各種版本
來源 : https://www.c-sharpcorner.com/UploadFile/20c06b/icommand-and-relaycommand-in-wpf/
    public class RelayCommand : ICommand
    {
        private Action<object> execute;
        private Func<object, bool> canExecute;

        public event EventHandler CanExecuteChanged
        {
            add { CommandManager.RequerySuggested += value; }
            remove { CommandManager.RequerySuggested -= value; }
        }

        public RelayCommand(Action<object> execute, Func<object, bool> canExecute = null)
        {
            this.execute = execute;
            this.canExecute = canExecute;
        }

        public bool CanExecute(object parameter)
        {
            return this.canExecute == null || this.canExecute(parameter);
        }

        public void Execute(object parameter)
        {
            this.execute(parameter);
        }
    }
使用 Command
執行結果 :

參考 :
https://www.c-sharpcorner.com/UploadFile/20c06b/icommand-and-relaycommand-in-wpf/
http://blog.sanc.idv.tw/2011/12/wpf-mvvm.html